

Phone: (1-868) 650-3575
Fax
(1-868) 650-4837
Email shazameil@gmail.com
Email shazameil@gmail.com
Address
150 Caratal Road
Gasparillo
Trinidad, West Indies
Gasparillo
Trinidad, West Indies
English
0
No products in the cart.
Single and Double Dead Bolt Mounting Instructions
Mark Door
Fold and apply template to high edge of door bevel and mark center of door edge as indicated on template at desired height of from the floor.
Mark center hole on door face through guide on template for either 2-3/8″(60mm) or 2-3/4″ (70mm) backset.
Drill Holes
Drill thru door face as marked for lockset. It is recommended holes be drilled from both sides to prevent splitting. Hole size is 2″ (50.8mm) for standard installations
Drill 1″ (25mm) hole in center of door edge thru to 2″ (50.8mm) hole for latch.
Install Latch
Insert latch in hole keeping it parallel to face of door. Mark, outline and remove latch.
Chisel 1/8″ deep or until latch face is flush with door edge.
Install dead bolt latch in up position as shown on latch insert and tighten screws.
For round face deadbolt press flush to door edge. Bolt must be vertically aligned with door edge.

Install Strike
Bore a 1″ hole minimum deep for deadbolt
Mortise 1/16″ deep for strike aligning with 1″ hole in door. Insert and tighten screws.
Install Exterior Mechanism
Press cylinder side flush against door ensuring the torque blade is properly positioned in latch crank.
Tapped holes in mounting plate of exterior cylinder should be lined up with latch holes. Key hole should be in the down position.
Disclaimer: Torque blade should be horizontally inserted into latch crank. Incorrect mounting may cause lock to be locked but key cannot be removed.
Install Interior Mechanism
Slide thumb bar and interior rosette onto torque blade.
Insert screws through holes on rosette connecting to holes in the cylinder and tighten.
For Installation of Double Cylinder Deadlocks
Exterior half is fully assembled with exterior Torque blade
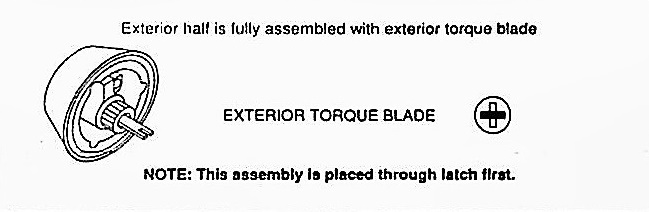
Please note, this assembly is placed through the latch first.
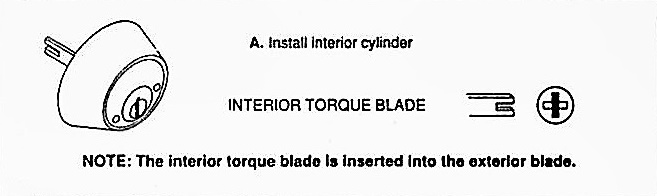
Install Interior cylinder by inserting the Exterior torque blade into the interior torque blade.
Press interior assembly flush against door making certain the torque blade is properly positioned in latch hole. Key hole should be in the down position.
Insert two (2) screws through the countersunk holes connecting to exterior cylinder.
